Teardown Process
Teardown is an important process and not one that should be rushed. You might think you can just rip off old fabric and be done with it, but that's not the case. You will learn a lot about how your furniture piece was put together while your'e taking it apart. Also you will want to be careful during this process so you don’t damage any of the exposed wood or compromise the frame. Depending on the size and condition of the piece that you are reupholstering, tear down can take a couple hours to a couple days. I usually recommend tearing down a piece to the bare frame.
Don’t take shortcuts here! People may ask "Can I reupholster over the old fabric?" Upholstering over old fabric leads to inconsistency and lower quality in the final product.
Take alot of pictures before removing the fabric
Start with pictures of all sides of your project. Take close-ups of any details or parts that you want to be sure to remember. Throughout the entire teardown process as each area is uncovered, taking pictures is crucial! Pictures serve as a great reminder for things such as how much padding was used, or to refer back to where or how something was attached. Make sure you don’t skip this step!
When you begin to remove the fabric and other materials, keep in mind that you will be removing items in the reverse order of how you will put them back on again. For example, the first thing you remove on your piece of furniture is the dust cover on the bottom. However, when you are reupholstering it will be the last thing you attach.
Starting with the Bottom – Remove Dustcover
Once the dust cover is off, remove all of the staples from bottom side of the chair frame.
Then remove the outside back fabric and outside arms. Make sure that you've removed all the staples and remember to take pictures as you go.
After you've removed the fabric from the outside back and arm, then remove the padding. Again, be sure to remove any staples you see attached to the back of the chair frame. You will see that the inside back, inside arms, and the seat or deck are all attached to the back and bottom of the furniture frame.
Next, Move on to the Inside Back, Inside Arm, and Seat
Remove the staples from the inside back, inside arm, and seat fabric. Just remember to take plenty of pictures in case you forget how something was attached or in what order it was removed. Also remember you are removing items in the reverse order of how they will go back on. I will often leave the fabric on one arm until after I have finished reupholstering the other arm.

Remove Burlap
Removing the fabric layer will reveal the support system of the chair. Once you have exposed the seat, you will see burlap covering the springs and webbing. Depending on the type of furniture piece you are reupholstering, this may vary.
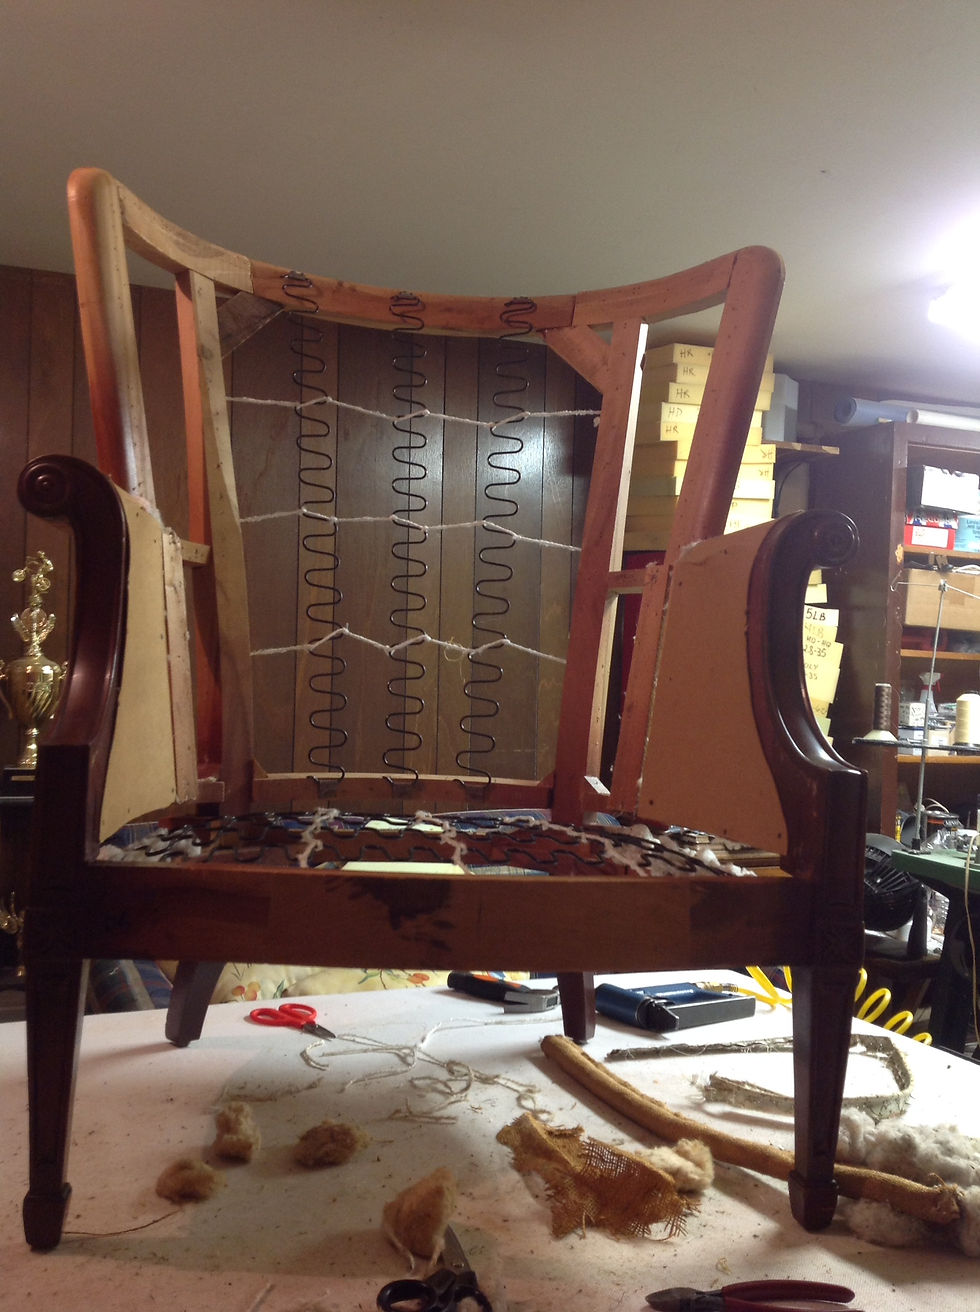
You might also find springs on the inside back of the chair. If this is the case, focus on the back of the chair first, removing the Burlap and edge roll. Before removing the piece of burlap edge roll take more pictures. Mark the frame where the edge roll ends on the sides if necessary.
As you begin to remove the burlap, take pictures of the layout of webbing and springs. Remove any staples or tacks from the chair frame holding the springs and webbing in place. Don't remove the springs from the webbing yet!
Remove Deck Support System
After you remove the springs and webbing from inside backrest, move on to the deck and do the same thing. Remove the burlap edge roll and burlap from the seat to reveal the springs. Make sure all the staples in the chair frame are removed. Now that you can see the seat’s springs take more pictures!
Before you remove the springs, you will want to mark the frame for the layout of the springs. Now you can turn your chair back upside down to remove the tacks or staples holding the webbing in place. Don't cut the springs loose from the webbing yet. I usually wait until I am ready to tie them onto the new webbing before I remove them from the old webbing.
Last but not least!
You have successfully completed the tear down process! However, there is one more thing you should do. Now that you have your bare furniture frame, you should make any necessary frame repairs and touch up any exposed wood. If the frame is loose or damaged take care of those first. Then move on to wood touch up.
Old English Scratch Cover, which comes in two colors for light and dark wood is a great option. Just put a little on a rag, wipe it on to the wood, let it dry a bit then wipe off the excess. This will cover any scratches in the wood. It is always a good idea to test any product on the wood in an inconspicuous place first.
Now you are done preparing your furniture for reupholstery and you are ready for the next phase!
Comentários